
How often have you bounced off a website because image optimization wasn’t done? Or have you been frustrated trying to make out an image that was too blurry, pixelated, or didn’t even render? As we transition into 2024, with Core SEO ranking factors evolving and images playing a pivotal role in search, we, as developers, need to grapple with these questions.
This guide will help you understand the what, why, and how of image optimization, from its basics to more complex topics like the technicalities of file formats, compression techniques, and the role of tools like Cloudinary.
In this article:
- What is Image Optimization?
- Core SEO Ranking Factors for 2024 and Beyond
- The Factors of Image Optimization
- Image Optimization Checklist
- Image Optimization with Cloudinary
What is Image Optimization?
Image optimization is about presenting your images in the best possible format and size without sacrificing quality. It involves maintaining visual clarity while reducing byte size. With image optimization, you can create and deliver high-quality images in the right format, dimension, and resolution for whatever device is accessing them.
Why Image Optimization Matters
An optimized image loads faster, engages the user, and boosts the overall performance of a site. Plus, it has a massive impact on your SEO results. Properly optimized images ensure that Google and users can easily understand and view them, enhancing your website’s credibility and user experience.
From an SEO perspective, compressing images and adding the correct alt text can be the difference between Google understanding an image’s context or not. You want Google and other search engines to comprehend your images, not just because they’ll rank better but also because they enhance accessibility for users relying on screen readers.
Core SEO Ranking Factors for 2024 and Beyond
SEO isn’t stagnant. As 2024 approaches, the dynamics of SEO are evolving, and the ranking factors are no exception. While content relevance, backlinks, and user experience are still kings, other elements, like image optimization, are climbing the ladder of importance.
Given the web’s visual-centric nature, image-related SEO factors are getting the limelight. Compressing images so they load faster, ensuring that Google can decode alt text, and providing the highest quality within the smallest size are all becoming essential. Additionally, large, unoptimized images can drag down your Largest Contentful Paint (LCP) score – a measure of how quickly the main content of a page loads.
The Factors of Image Optimization
Properly optimized images ensure a user-friendly experience, reflecting positively in search engine rankings while upping engagement rates. However, image optimization isn’t a one-size-fits-all process. There are various aspects to consider to get the most out of your media. Factors like file size, format, resolution, and delivery method can significantly impact the effective optimization of your website’s visuals.
Let’s shift gears and break down these different components of image optimization, their benefits, and how they contribute to overall web performance and user experience.
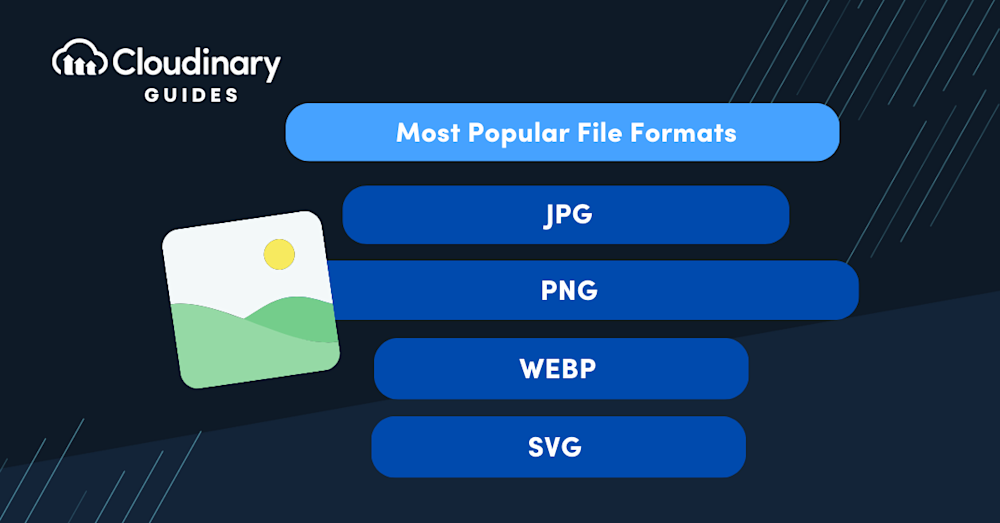
File Format
Choosing the suitable file format is like selecting the best tool for the job. Different image types serve different purposes:
- JPG – This format should be your first choice for photographs or detailed images. Thanks to its lossy compression, it significantly reduces file size by letting go of some image data. This compression is designed so our eyes typically can’t spot lost details.
- PNG – The format you’d lean toward for images that demand transparent backgrounds or graphics characterized by sharp contrast and a limited color palette. Even though PNG files are generally bulkier than JPEGs, they compensate for it with their lossless compression, vouching for a better quality.
- WebP – Introduced by Google, has excellent compression capabilities in its lossy and lossless variants. It’s now widely supported by many modern browsers, leading to noticeably reduced file sizes without sacrificing image quality.
- SVG – When it comes to vector graphics, especially logos and icons, SVG shines. Being XML-based, these graphics maintain their sharpness irrespective of their scale. However, a word of caution: SVGs and photographs aren’t the best match.

Quality and Size
Striking a balance between image quality and file size is an art form. Here are some pointers to nail it:
- Resize Before Uploading. An often-overlooked step. If your webpage displays an image at 500×500 pixels, don’t upload a 2000×2000 pixel one. Resize it to the exact display dimensions.
- Adjust Quality Settings. Most image editing tools let you adjust the quality of an image when saving. A slight reduction can lead to significant file size savings. For instance, reducing a JPEG’s quality to 80% can cut its size in half without noticeable quality loss.
- Use DPI Wisely. A higher dots-per-inch (DPI) is essential for print but is overkill for the web. A 72 DPI is generally ample for online use.
Lossy vs Lossless Compression
When it comes to image optimization, deciding between lossy and lossless optimization is like choosing between a fast car and a fuel-efficient one. Both have advantages, and knowing which to use and when is key.
Lossy optimization, as its name indicates, means some data gets sacrificed. This technique can greatly reduce file sizes by trimming non-essential details. It’s an excellent choice for web images where faster load times are crucial. However, there’s a cautionary note: the image might lose clarity if taken to the extreme.
On the other hand, there’s lossless optimization. Think of it as the method for the meticulous. It ensures every bit of the image remains intact during the compression process. While you might end up with slightly larger files than with Lossy, the upside is that you don’t lose image quality. This approach is best when any compromise on quality is out of the question.
Image Optimization Checklist
For the developers who love a good checklist, here’s a quick rundown to ensure your images are optimized for the web:
- Choose the Right Format. JPEG for photos, PNG for transparency, SVG for vectors, and WebP for overall efficiency.
- Pre-Resize Your Images. Tailor them to the exact size they’ll be displayed on the web.
- Adjust Quality as Needed. A slight drop in quality often yields significant size reduction without noticeable difference.
- Compress Smartly. Decide between lossy and lossless based on the image’s purpose and the audience’s needs.
- Label Accurately. Ensure images have relevant metadata and alt text for SEO and accessibility.
- Benchmark Performance. Regularly check your site’s speed. A tool or plugin can help automate this.
Image Optimization with Cloudinary
When it comes to web development, every detail counts—especially when keeping your website fast and user-friendly. Cloudinary, a powerful cloud-based image and video management solution, streamlines this task by automatically optimizing your media assets. Not only does Cloudinary help your site rank higher in search results, but it also enhances the overall performance and conversion rates.
Image optimization with Cloudinary is as straightforward as uploading your images and letting the magic happen. The platform provides a URL-based API that empowers developers to transform and optimize any raw image as needed. By using the q_auto parameter in the image URL, Cloudinary chooses the most visually appealing and size-efficient file format that best matches the client’s browser and device specifications.
Additionally, the f_auto parameter ensures that the optimal file format is used for diverse devices and browsers, taking into account WebP, JPEG, and PNG support. Furthermore, Cloudinary boasts a wealth of other transformation and optimization options, such as crop, resize, and overlay, all easily integrated within your image URL.
Closing Thoughts
As we’ve explored, image optimization isn’t just about making photos or graphics look good; it’s about ensuring they load quickly, improve user experience, and boost SEO rankings. As developers and website managers, catering to user needs and search engine preferences is a delicate balance, but it’s entirely achievable with the right knowledge and tools.
One can’t overlook the differences between Lossy and Lossless optimization or the choices in file formats. These decisions can influence how your website performs in terms of speed and user engagement. Knowing when and where to use JPEG, PNG, WebP, or SVG can mean the difference between a user staying on your site or leaving due to frustration.
Taking your web project’s performance to new heights has never been easier, thanks to Cloudinary’s image optimization features. This robust tool makes media asset management a breeze, allowing your website to shine and thrive in the competitive online landscape.
So, let Cloudinary work its magic and give your users the seamless experience they expect and deserve.
;rgba(153,153,153,0.1);rgba(153,153,153,0.5)" dur="2s" repeatCount="indefinite" /></rect></svg>)