Cloudinary AI Background Removal
Last updated: Aug-29-2024
Cloudinary is a cloud-based service that provides solutions for image and video management, including server or client-side upload, on-the-fly image and video transformations, quick CDN delivery, and a variety of asset management options.
The Cloudinary AI Background Removal add-on combines a variety of deep-learning algorithms to recognize the primary foreground object(s) in an image and accurately remove the background in a matter of seconds. You can optionally specify one of a set of object names to instruct the add-on to remove everything except that object.
Getting started
Before you can use the Cloudinary AI Background Removal add-on:
You must have a Cloudinary account. If you don't already have one, you can sign up for a free account.
Register for the add-on: make sure you're logged in to your account and then go to the Add-ons page. For more information about add-on registrations, see Registering for add-ons.
Keep in mind that many of the examples on this page use our SDKs. For SDK installation and configuration details, see the relevant SDK guide.
If you are new to Cloudinary, you may want to take a look at How to integrate Cloudinary in your app for a walk through on the basics of creating and setting up your account, working with SDKs, and then uploading, transforming and delivering assets.
Activating the add-on
The default background removal behavior detects the foreground object(s) of the image and removes the background. You can activate this behavior in one of two ways:
-
Recommended: On the fly, by specifying the
background_removaleffect transformation parameter when delivering images (e_background_removalin URLs). -
Legacy (retained for backward compatibility): By setting the
background_removalparameter tocloudinary_aiwhen uploading an image (Uploadmethod), or by using theUpdatemethod of the Admin API for existing images.
You can also include additional directives for indicating what the AI algorithm should treat as the foreground object to keep. For details see: Specifying the foreground object below.
Removing the background on the fly
Removing the background on the fly keeps the original image intact and creates a derived version of the image with the background removed.
When background removal is requested on the fly, initially a 423 error response is returned, until the background removal process has completed. This only happens for the first request. After this, the image is cached, so subsequent requests to the same URL will return the background-removed image. You can request background removal as an eager transformation to prepare the derived versions in advance of the first request.
To remove the background of an image on the fly, specify the background_removal effect (e_background_removal in URLs). For example:
See full syntax: e_background_removal in the Transformation Reference.
Try it out: Background removal in the Transformation Center.
You can combine this transformation with other transformation parameters, but the background removal effect must be the first component in the chain.
For example, to apply the grayscale effect, first specify e_background_removal, then specify e_grayscale:

To replace the background with a different image, apply the new background as an underlay. For example, replacing the couch with a road, scaling and positioning the dog appropriately:

See background removal being applied to product images on the fly in a React app.
- You can combine the
background_removaleffect with other transformation parameters, but thebackground_removaleffect must be the first component in the chain. - With no other action parameters in the same component (as per our best practice guidelines), the background-removed version is saved so that when used for other derived versions of the background-removed asset, the add-on is not called again for that asset.
- The first time the add-on is called for an asset, a 423 error response is returned until the processing has completed.
- The add-on imposes a limit of 4,194,304 (2048 x 2048) total pixels on its input images. If an image exceeds this limit, the add-on first scales down the image to fit the limit, and then processes it. The scaling does not affect the aspect ratio of the image, but it does alter its output dimensions.
- Background removal on the fly cannot currently be used for image overlays. Instead, apply the base image as an underlay.
- Background removal on the fly is not supported for fetched images.
- Background removal on the fly is not supported for incoming transformations. If you need this use case, you can remove the background on upload.
Defining the edges of the foreground object
If you know that your image has a foreground object with fine detail around its edges, for example fur, you can request to keep this detail by specifying the fine edges option.
- You should not use this option if you know that the object has more clear-cut edges.
- There is no need to use this option on images of human hair, as a special algorithm is applied if hair around a face is detected.
To do this on the fly, set the effect parameter to background_removal:fineedges_y:
You can see the difference more clearly when you zoom in (click each image to open in a new tab):
When uploading or updating an image, set the background_removal parameter to cloudinary_ai:fine_edges:
Delivering and transforming your new image
After the background has been removed from your image, you can take advantage of a variety of image transformations to deliver the new image to your users.
Use case #1 - Add a shadow to a product image
If all the product images in your online store have a shadow, then after you've applied the Cloudinary AI Remove the Background add-on to this router photo, you could use the transformation code below to apply a shadow to the delivered image.
Learn more: Apply a drop shadow effect
Use case #2 - Apply green screen style backdrops
You can take advantage of the Cloudinary AI Remove the Background add-on to provide an app with fun effects. For example, you could allow users to upload images of themselves and then select new background locations by adding the desired scenery as an underlay behind your transparent background.
For example, you could use the following delivery code to relocate this woman from her office to the beach:
Guidelines and best practices
This add-on is based on a combination of neural networks that were trained on a large dataset to create precise segmentation maps of salient objects and refine those maps to accurately separate the edges of the foreground from the background. These neural networks were also optimized to enable returning the result within seconds regardless of the image size.1
In the great majority of cases, these deep-learning algorithms return high quality results. The following best practices can further increase the likelihood of good results:
- Make sure there is enough background around the foreground object(s) on all sides.
- Try to avoid large shadows. This is especially relevant if the background is a single color. For example, if the main subject is photographed against a plain light colored background, the object's shadow might be classified as part of the foreground.
- In some cases, hair or other very small or blurry parts on the edges of a foreground object might be blended with the background. For example, try to avoid hairs blowing in the wind.
- In some cases, strong changes in contrast, such as a bright lamp or a bright sun included in the photo, can impact the results.
- Light-colored reflections on a shiny object (e.g. shine from the camera flash) may be treated as part of the background and removed, especially if the color of the reflection is similar to the main background color.
- Images containing transparent objects, such as a glass jug, may not give good results.
However, as with any Deep Learning-based algorithm, even if you follow these guidelines, the results may not always be perfect. Additionally, keep in mind that the neural networks are continually training on new data and thus results may be different over time.
If you are not satisfied with the results of a background removal operation, you can try the Pixelz Remove the Background add-on, which automatically uploads your original image to the Pixelz team of human experts who manually remove the background of your image within 24 hours. When complete, the new image replaces your original one in your product environment. You can monitor the status using a notification_url.
1The add-on imposes a limit of 4,194,304 (2048 x 2048) total pixels on its input images. If an image exceeds this limit, the add-on first scales down the image to fit the limit, and then processes it. The scaling does not affect the aspect ratio of the image, but it does alter its output dimensions.
Removing the background on upload/update
Unlike removing the background on the fly, when you remove a background on upload, only the background-removed image is stored, not the original. If it isn't already a PNG, it is converted to a PNG with a transparent background.
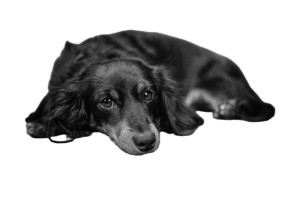
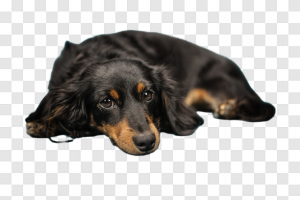
The code below uploads the photo shown below on the left and activates the Cloudinary AI background removal add-on. The photo that ultimately gets stored in the product environment is the dog image shown on the right, with a fully transparent background.
Learn more: Upload presets
Removing the background from existing images
You can remove the background from existing images using the Update Admin API method. The existing image is overwritten with the background-removed image.
Asynchronous handling for upload/update
Although the background removal algorithm usually takes only a few seconds, it is still handled asynchronously after the original file is uploaded or updated. Therefore, the immediate upload response indicates that the background_removal status is pending. For example, here's the upload response from the above dog-on-couch image.
Immediately after you perform the upload or update method, the image in your product environment is your original image. When the background removal process is complete, the original image is overwritten with a PNG containing the foreground image and transparent background.
If you requested a notification in your upload or update call by adding the notification_url parameter, the endpoint you specified will receive a JSON POST request when the background removal is complete, including the new url & secure_url with the updated .png file extension and new version number:
Confidence score
The notification response returns a confidence score, which is a measure of how successful the background removal, and hence the resulting image, is likely to be. For low scores, you could for example, send the image for manual moderation using the explicit method, or perhaps use the Pixelz - Remove the Background add-on instead.
In addition to the notification response, the confidence score is also reported in responses to calls to the Admin API resources endpoint where asset details are returned.
For example:
Sample response:
Restore from backup
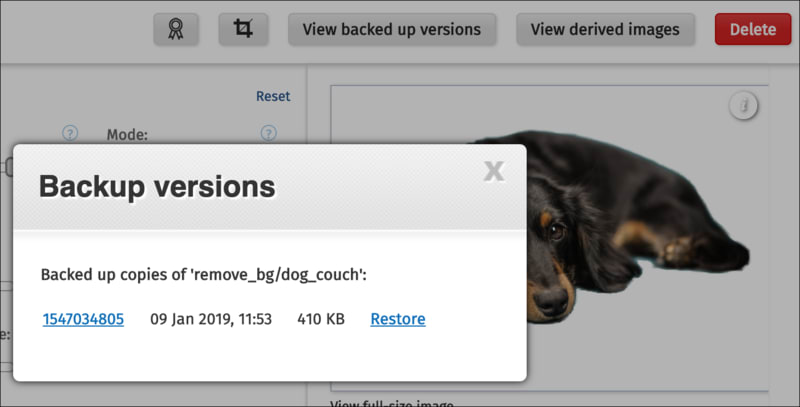
When the newly generated (background-removed) image overwrites the old one, both the original image and background-removed image are backed up and are accessible from the View backed up versions button, available when you open the Edit Transformation page for that image in the Media Library. This backup is performed for all images where the Cloudinary AI Remove the Background add-on is applied, even if you haven't enabled backups globally for your product environment.
- If your product environment does not have global backup configured and backup was not requested during the upload (either in the request or in the upload preset), then none of the images are backed up.
- If your product environment does have global backup configured, or backup was requested during the upload (either in the request or in the upload preset), then only the original image is backed up, and not the background-removed one.
 Programmable Media
 Digital Asset Management


