As we take up our digital tools each day, we are met with the thrill of molding web experiences in the vast, dynamic world of the internet. A piece of this puzzle involves working with, and sometimes between, media formats, like converting WebM videos to PNG images.
WebM gives us compact, high-quality video content, perfect for web streaming and interactive media. Yet, in some situations, what you really need is a static image, a snapshot from that video. Enter PNG. With its lossless condition, transparency capabilities, and potent visual impact, it’s the lifeline you need when a video frame must transform into an image.
There are instances where there’s a need to jump media formats, and that’s what we’re diving into. Join us as we navigate the seas of media conversion, allowing you to optimize website content without sacrificing quality or memorable user experience.
In this article:
What is WebM and PNG?
WebM, hailing from the house of Google, is a versatile audio-video format designed exclusively for web use. With its high-quality video streams and adaptive bitrate, WebM is your key to impressive, high-fidelity media content that doesn’t choke your bandwidth. Simply put, it’s perfect for everything from embedding videos to online streaming.
For PNG, it’s a lossless image format known for its quality retention and transparency support. It shines in representing line graphics, text, and iconic imagery, especially when you need to preserve the image’s integrity after multiple saves and reuses.
Which one to pick? WebM is your best bet for rich, web-optimized video content, while PNG is the champion for high-quality, transparent static images. Remember, understanding your media formats is the first step to a more efficient and interactive web experience.
Why Convert WebM to PNG?
Navigating the depth of media formats might seem like a techy Everest. Let’s take a moment and consider a scenario where you’ve got a WebM video, but what you really need for optimal user experience is a static image.
Conversion from WebM to PNG makes a lot of sense in certain circumstances, offering numerous benefits, a few of which are:
- Quality preservation. PNGs are lossless, meaning every time you save, the image’s quality remains unscathed. So, you get the perfect snapshot, untouched in its vibrancy!
- Transparency support. Need to overlay your image on varied backgrounds? No worries! PNG’s ability to support transparent backgrounds facilitates your design to a great extent.
- SEO and performance benefits. Compared to using video content, static images are more SEO friendly due to faster load times and ease of alt-tag usage.
- Ideal for simple artwork or logos. Especially when dealing with logos, text, and icons that require precise lines and colors, a PNG, derived from a WebM video, stands out.
Ways to Convert WebM to PNG
Multiple methods exist to convert WebM files to PNG, catering to manual and automated preferences. Let’s explore the most common converters and the automated solution provided by Cloudinary.
Online-Convert
There are numerous online tools that allow users to convert WebM to PNG without the need for software installation. Websites like Online-convert, and Convertio offer user-friendly interfaces, enabling quick and simple conversions. Online-convert is a really easy-to-use online tool for converting files. It has a user-friendly interface and customization options for a smooth conversion experience.
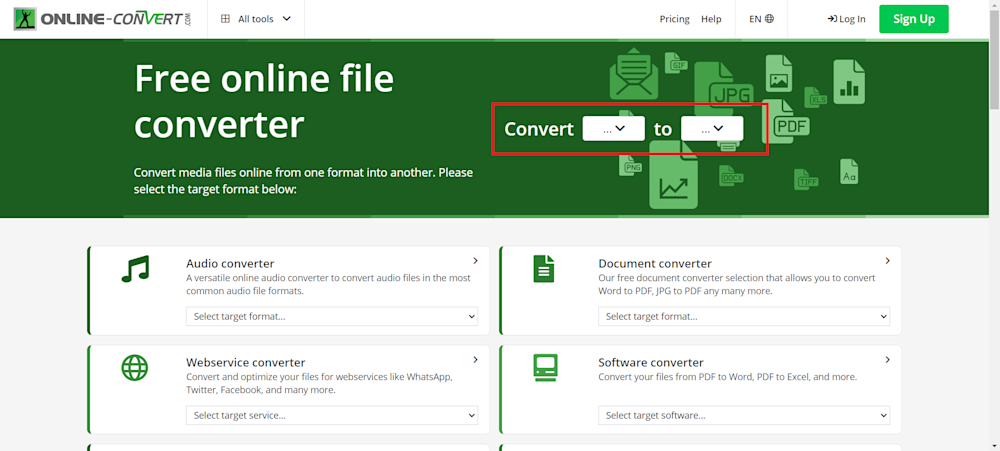
To start your WebM to PNG conversion, head over to online-convert.com. The website supports many files and formats, giving you plenty of flexibility. Once there, use the drop-down menus to select the appropriate conversion format.
Now, simply upload your WebM file using the Choose File button. Once your video has been fully uploaded, click on the Start Button.
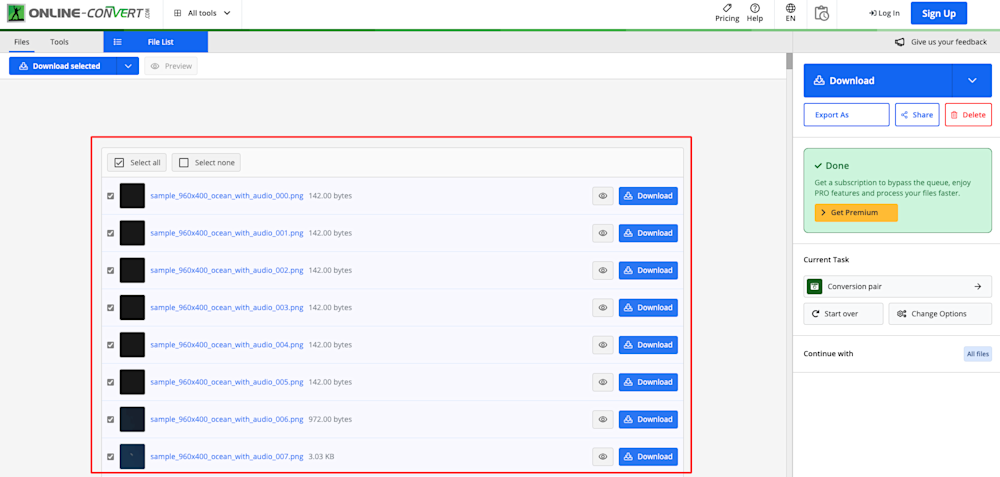
You will be redirected to a new page and will need to wait for the video to be processed. Once it’s done, you will be able to see all of the PNG images. You can then view and download the ones you want
Similarly, Convertio is another online platform that offers a user-friendly and secure online platform, making it easy for users to convert their files. This makes it perfect for both beginners and experts.
VLC Media Player
When it comes to converting Desktop Software, several software options are available, each catering to different user needs and preferences. One of the widely used software for this purpose is VLC Media Player. Let’s take a look at how you can use VLC to convert your WebM videos.
Start by downloading and installing VLC from the official VLC website and launch VLC Media Player.
On Windows
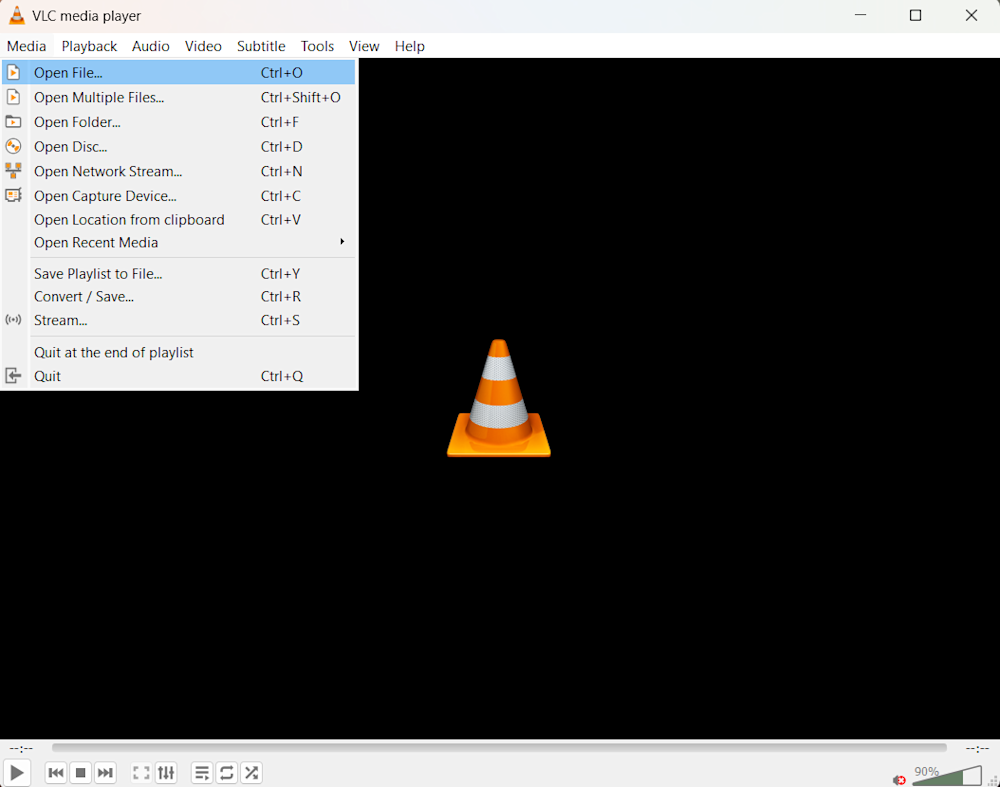
Click on the Media tab in the menu bar and select Open File.
Now, navigate to the directory containing your WebM file and open it up.
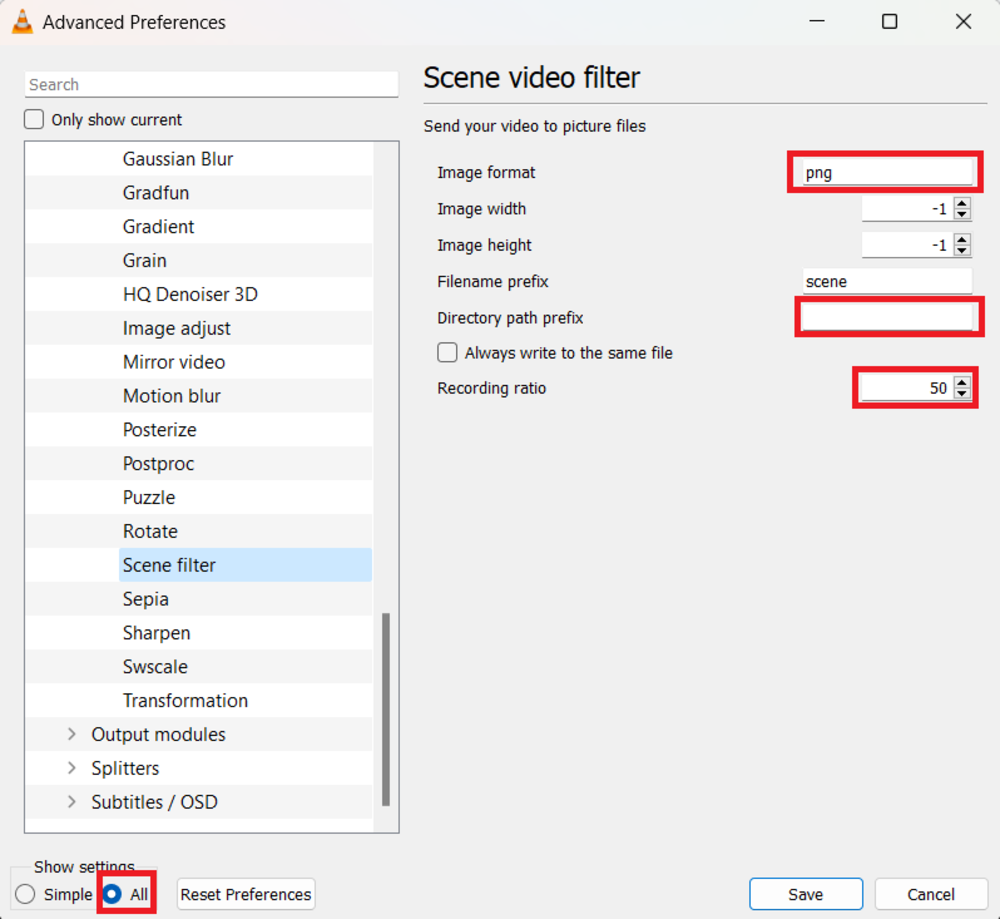
Next, go to the Tools tab in the Menu bar and click on Preferences. In the Preferences window, open up all the settings by selecting the All radio button. Now head over to Video > Scene Filter. Here, select the Image format as PNG and add your save path in Directory path prefix. Optionally, add the recording ratio, which dictates the seconds at which an image would be saved.
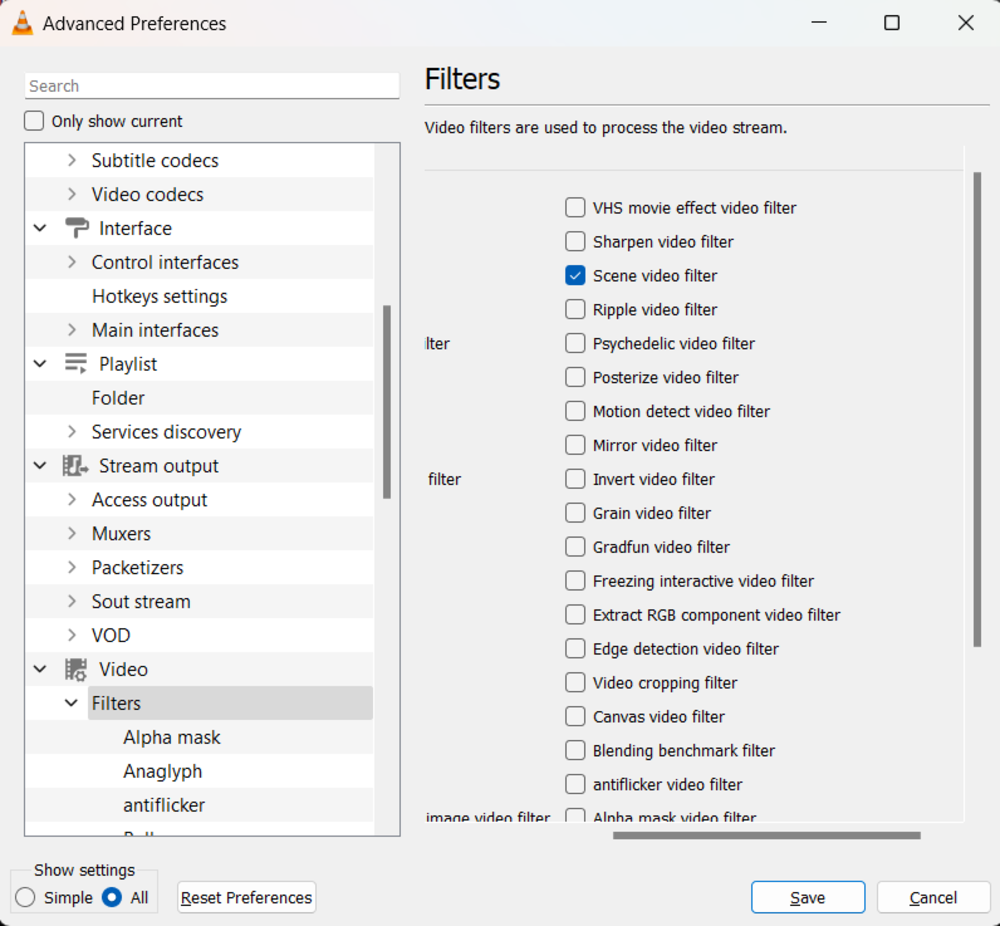
Now head to the Video > Filter and enable this filter by selecting the Scene video filter checkbox.
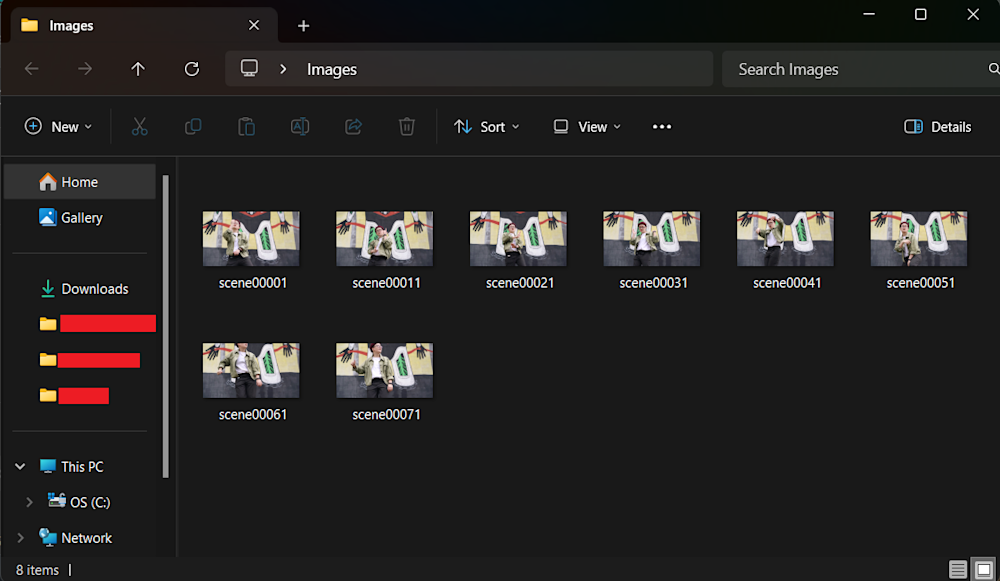
Finally, click on Save to save your changes. Now, playing the video will export the images to your selected directory.
Pro TipTransform Images On-The-Fly
Manually transforming a large number of images can be tasking and time-consuming. Cloudinary allows you to easily transform your images on the fly to any required format, style and dimension, and apply effects and other visual enhancements.
Automatically Convert WebM to PNG With Cloudinary
Cloudinary is another powerful platform that enables users to convert files to various formats, such as WebM to PNG. More than just a conversion tool, Cloudinary is a comprehensive media management platform that allows users to transform content dynamically. Leveraging its robust API and user-friendly interface, individuals can seamlessly harness its capabilities to convert their files easily.
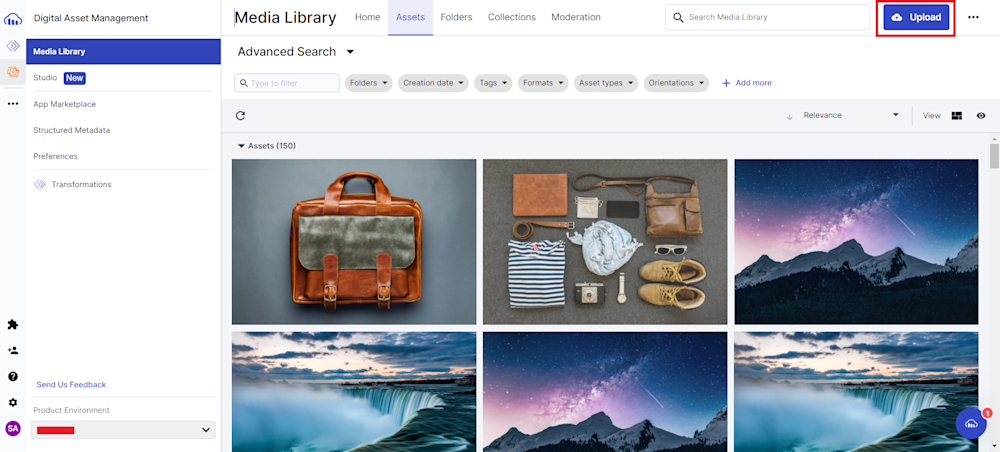
To convert your files using Cloudinary, start by logging in. If you don’t have an account, sign up for a free account on the Cloudinary website. Next, log in to your account and navigate to the Assets tab in the Media Library. Locate and click the Upload button in the top-right corner to upload your WebM file.
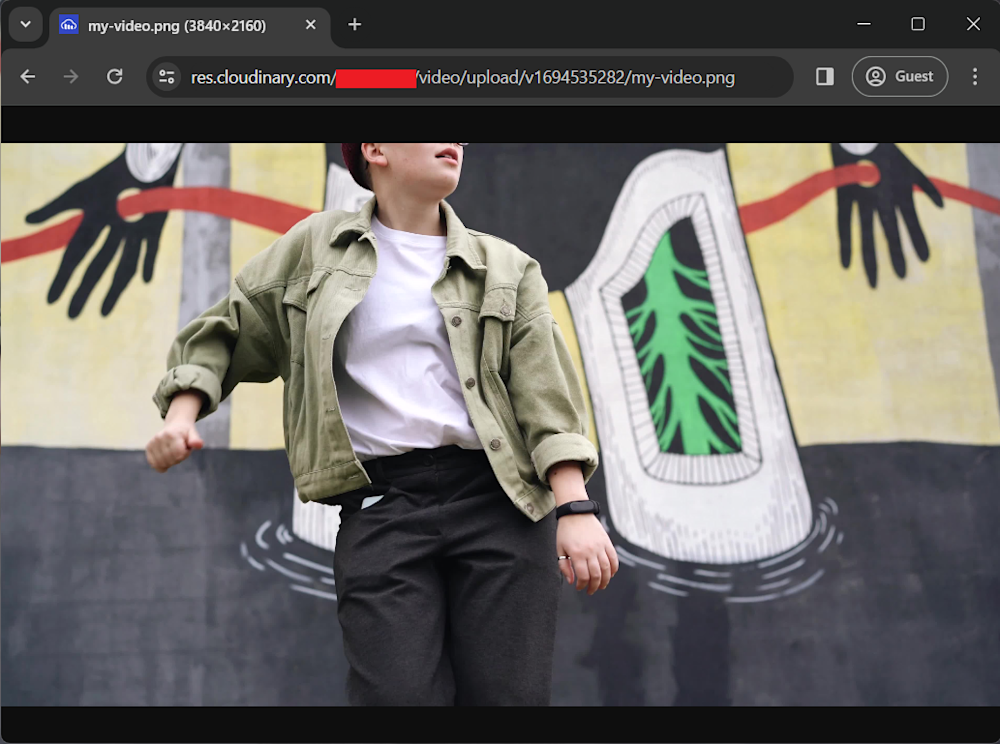
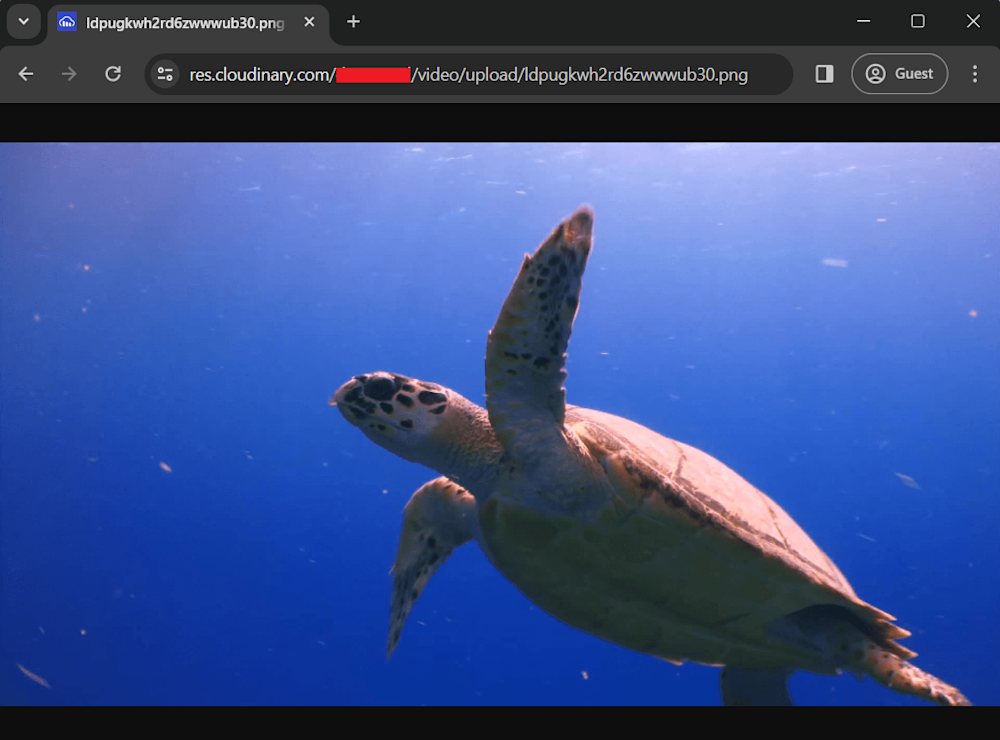
Once uploaded, you will see your file appear in the Assets. Click on the <> at the top of your file to copy the video url. Before pasting the url in a new tab, replace the .webm with .png. This will automatically trigger Cloudinary to initiate the format transformation, providing you with a downloadable PNG file.
Finally, right-click on the image and download your transformed file.
Programmatically Convert WebM to PNG With Cloudinary
Cloudinary offers a step-by-step method to convert WebM files to PNG for users who prefer manual control over the conversion process. Let’s take a look at how you can change your file formats using Cloudinary in Node JS.
Start by installing the Cloudinary Node JS SDK by running the following command in your project directory:
npm install cloudinary
Next, open up a new file in your project directory and rename it to converter.js. Now open up the file and start by requiring the Cloudinary module.
const cloudinary = require('cloudinary').v2;

cloudinary.config({
  cloud_name: 'your_cloud_name',
  api_key: 'your_api_key',
  api_secret: 'your_api_secret'
});
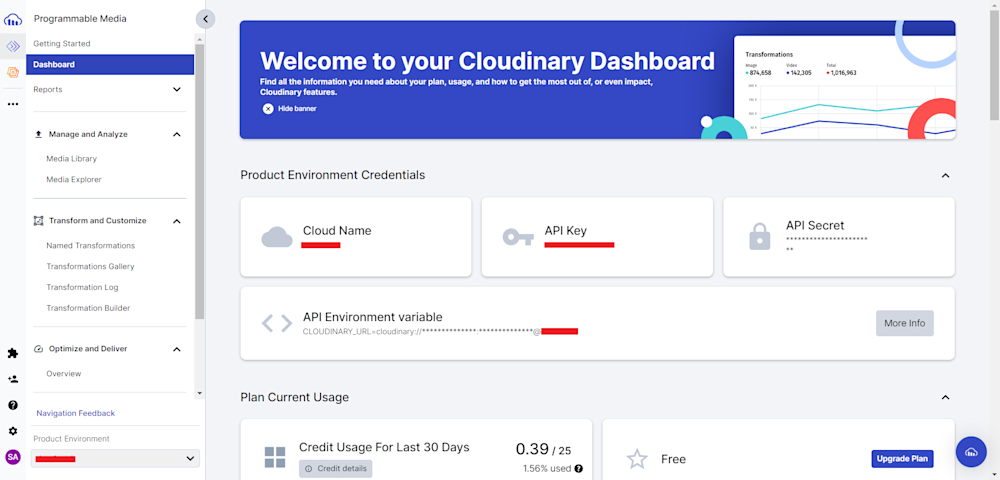
Now, login to your Cloudinary account and head over to the Dashboard tab. Here you will see your Product Environment Credentials, copy these credentials and replace your_cloud_name, your_api_key, and your_api_secret with your credentials to configure the Cloudinary SDK.
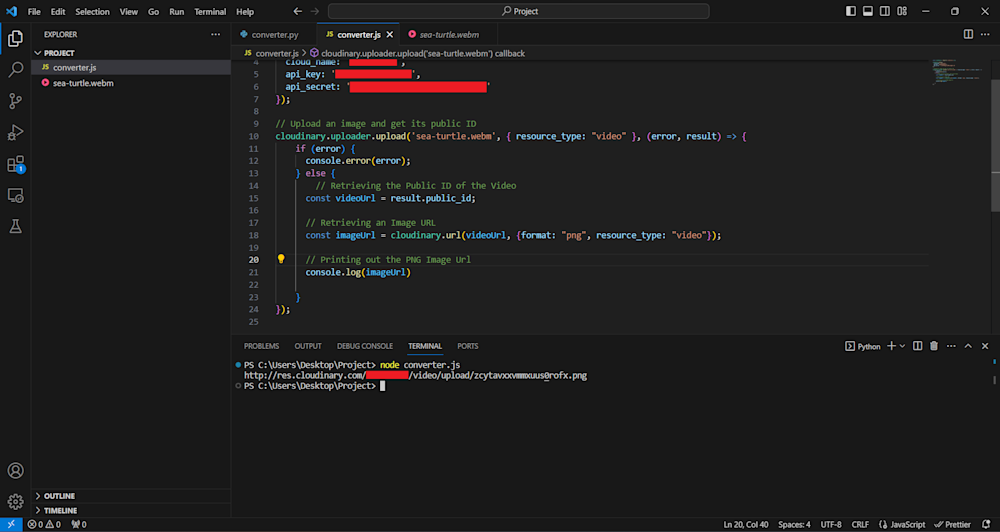
Next, use the upload function to upload your WEBM file to the Cloudinary cloud. You will also need to specify the resource_type as "video". Now, retrieve the public_id using the result from the upload call. Once the public ID has been retrieved, you will create a new url using the .url method, specifying the format as a PNG. Finally, print out the URL in the console.
// Upload an image and get its public ID
cloudinary.uploader.upload('sea-turtle.webm', { resource_type: "video" }, (error, result) => {
    if (error) {
      console.error(error);
    } else {
        // Retrieving the Public ID of the Video
      const public_id = result.public_id;

      // Retrieving an Image URL
      const imageUrl = cloudinary.url(public_id, {format: "png", resource_type: "video"});

      // Printing out the PNG Image Url
      console.log(imageUrl)

    }
});
Now, we must run our code and wait as a new PNG image is created. Here are the results:
Final Thoughts
The process of converting WebM to PNG not only unlocks the potential of individual frames within videos but also opens up new creative and practical possibilities. PNG’s support for transparency, lossless compression, and versatility makes it an ideal choice for several use cases.
Regarding the several options available for image conversion, we’ve explored some of the primary methods in this post. Each approach has its merits, catering to different needs and preferences. However, if you’re seeking a comprehensive solution that combines the power of the console and code with the ability to process images in bulk efficiently, we recommend Cloudinary. Cloudinary provides both console and code-based approaches, allowing you to harness the full potential of your image assets.
Don’t miss the opportunity to streamline your image transformation workflow with Cloudinary’s powerful capabilities, and create an account today!
Learn more:
